Использование таблиц inserted и deleted
Содержание:
- Как вставить значение из другой таблицы INSERT INTO … SELECT …
- Insert multiple rows in the table
- Frequently Asked Questions
- Inserting Data From a Query Result
- SQL INSERT INTO SELECT Examples
- SQL References
- Insert Multiple Rows in One Statement
- INSERT INTO SELECT Query
- Examples
- Simple INSERT query example
- Example — Using VALUES keyword
- INSERT INTO TABLE using Excel
- Вставка строк, некоторые из которых уже существуют в целевой таблице
- SQL Учебник
- SQL Справочник
- Insert Data into SQL Server Using an Explicit Column List
- Insert Data SQL Server with OUTPUT INSERTED
- How to perform a simple Insert
- Practice Exercise #2:
- Примеры SQL INSERT INTO SELECT
Как вставить значение из другой таблицы INSERT INTO … SELECT …
Допустим у нас есть еще одна таблица которая по структуре точно такая же как и первая. Нам в таблицу table2 нужно вставить все строки из table1.
Вставляем значения из table1 в таблицу table2:
INSERT INTO table2 (a, b, c) SELECT a, b, c FROM table1;
Вам следует позаботиться об уникальности ключей, если они есть в таблице, в которую мы вставляем. Например при дублировании PRIMARY KEY мы получим следующее сообщение об ошибке:
/* ERROR 1062 (23000): Duplicate entry '100' for key 'PRIMARY' */
Если вы делаете не какую-то единичную вставку при переносе данных, а где-то сохраните этот запрос, например в вашем PHP скрипте, то всегда перечисляйте столбцы.
Как не рекомендуется делать (без перечисления столбцов):
INSERT INTO table2 SELECT * FROM table1;
Если у вас со временем изменится количество столбцов в таблице, то запрос перестанет работать. При выполнении запроса MySQL в лучшем случае просто будет возвращать ошибку:
/* Ошибка SQL (1136): Column count doesn't match value count at row 1 */
Либо еще хуже: значения вставятся не в те столбцы.
Insert multiple rows in the table
We want to insert details of the two employees in the tblemployee table. To do that, execute the following query:
| 1 | INSERTINTOtblemployee (employee_first_name,employee_last_name,employee_joining_date)values(‘Dixit’,’Upadhyay’,current_date()),(‘Bharti’,’Upadhyay’,current_date()); |
Once rows are inserted, execute the SELECT statement to verify the output:
| 1 | Select*fromtblemployee; |
The following is the output:

Note: In MySQL, there is a configuration parameter named max_allowed_packat_size to limit the size of the packet. The maximum package size in MySQL 8.0 server and client is 1GB.
If you are inserting multiple rows and the size of the INSERT query is higher than the value configured in max_allowed_packat_size, the query will give the ER_NET_PACKET_TOO_LARGE error and close the connection. You can see the value of the parameter by executing the following command:
| 1 | SHOWVARIABLESLIKE’max_allowed_packet’; |
Output:

The value of the configuration parameter can be changed by executing the following command.
| 1 | SETGLOBALmax_allowed_packet=your_desired_size; |
Frequently Asked Questions
Question: I am setting up a database with clients. I know that you use the SQL INSERT statement to insert information in the database, but how do I make sure that I do not enter the same client information again?
Answer: You can make sure that you do not insert duplicate information by using the SQL EXISTS condition.
For example, if you had a table named clients with a primary key of client_id, you could use the following SQL INSERT statement:
INSERT INTO clients
(client_id, client_name, client_type)
SELECT supplier_id AS client_id, supplier_name AS client_name, 'advertising' AS client_type
FROM suppliers
WHERE NOT EXISTS (SELECT *
                  FROM clients
                  WHERE clients.client_id = suppliers.supplier_id);
This SQL INSERT statement inserts multiple records with a subselect.
If you wanted to insert a single record, you could use the following SQL INSERT statement:
INSERT INTO clients
(client_id, client_name, client_type)
SELECT 10345, 'IBM', 'advertising'
FROM dual
WHERE NOT EXISTS (SELECT *
                  FROM clients
                  WHERE clients.client_id = 10345);
Inserting Data From a Query Result
Let’s say you wanted to create a new table, and populate it. But, you want to populate the data with the results of another query.
What could you do?
You could try:
- Run the SELECT query
- Copy the output to a spreadsheet file
- Use formulas to write a series of INSERT statements
- Copy those INSERT statements to an SQL file
- Run the SQL file
Sounds like a lot of work, right?
There is an easier way.
You can use an SQL INSERT INTO statement based on the results of a SELECT query – all in the one statement.
The syntax for this is:
You run a SELECT statement and the results of that are inserted into the table. The source_tablename is where the data comes from, and the target_tablename is where the data is inserted into.
There are a few tips for running an INSERT statement like this.
First of all, the columns and data types must match. You need to have the same number of columns, and you need to insert values of the same type. For example, you can’t insert a VARCAHR2 value into a NUMBER field.
Secondly, it’s a good idea to run the SELECT statement first as a test, by itself, before running the INSERT statement with the SELECT statement. This is so you can see the data that is returned by the SELECT statement and you can review it before it is inserted.
Let’s see an example.
This query will insert new values into the student table. The values come from the new_students table.
For some columns, the names being inserted are the same as the names in the target table. For others, they are different.
In this example, we are inserting a value of 1000 for fees_required, for all records.
So, the column names don’t need to match, but the number of columns and their data type does.
SQL INSERT INTO SELECT Examples
The following SQL statement copies «Suppliers» into «Customers» (the columns
that are not filled with data, will contain NULL):
Example
INSERT INTO Customers (CustomerName,
City, Country)
SELECT SupplierName, City, Country FROM Suppliers;
The following SQL statement copies «Suppliers» into «Customers» (fill all
columns):
Example
INSERT INTO Customers (CustomerName, ContactName, Address, City, PostalCode,
Country)SELECT SupplierName, ContactName, Address, City, PostalCode,
Country FROM Suppliers;
The following SQL statement copies only the German suppliers into «Customers»:
Example
INSERT INTO Customers (CustomerName,
City, Country)
SELECT SupplierName, City, Country FROM SuppliersWHERE Country=’Germany’;
❮ Previous
Next ❯
SQL References
SQL Keywords
ADD
ADD CONSTRAINT
ALTER
ALTER COLUMN
ALTER TABLE
ALL
AND
ANY
AS
ASC
BACKUP DATABASE
BETWEEN
CASE
CHECK
COLUMN
CONSTRAINT
CREATE
CREATE DATABASE
CREATE INDEX
CREATE OR REPLACE VIEW
CREATE TABLE
CREATE PROCEDURE
CREATE UNIQUE INDEX
CREATE VIEW
DATABASE
DEFAULT
DELETE
DESC
DISTINCT
DROP
DROP COLUMN
DROP CONSTRAINT
DROP DATABASE
DROP DEFAULT
DROP INDEX
DROP TABLE
DROP VIEW
EXEC
EXISTS
FOREIGN KEY
FROM
FULL OUTER JOIN
GROUP BY
HAVING
IN
INDEX
INNER JOIN
INSERT INTO
INSERT INTO SELECT
IS NULL
IS NOT NULL
JOIN
LEFT JOIN
LIKE
LIMIT
NOT
NOT NULL
OR
ORDER BY
OUTER JOIN
PRIMARY KEY
PROCEDURE
RIGHT JOIN
ROWNUM
SELECT
SELECT DISTINCT
SELECT INTO
SELECT TOP
SET
TABLE
TOP
TRUNCATE TABLE
UNION
UNION ALL
UNIQUE
UPDATE
VALUES
VIEW
WHERE
MySQL Functions
String Functions:
ASCII
CHAR_LENGTH
CHARACTER_LENGTH
CONCAT
CONCAT_WS
FIELD
FIND_IN_SET
FORMAT
INSERT
INSTR
LCASE
LEFT
LENGTH
LOCATE
LOWER
LPAD
LTRIM
MID
POSITION
REPEAT
REPLACE
REVERSE
RIGHT
RPAD
RTRIM
SPACE
STRCMP
SUBSTR
SUBSTRING
SUBSTRING_INDEX
TRIM
UCASE
UPPER
Numeric Functions:
ABS
ACOS
ASIN
ATAN
ATAN2
AVG
CEIL
CEILING
COS
COT
COUNT
DEGREES
DIV
EXP
FLOOR
GREATEST
LEAST
LN
LOG
LOG10
LOG2
MAX
MIN
MOD
PI
POW
POWER
RADIANS
RAND
ROUND
SIGN
SIN
SQRT
SUM
TAN
TRUNCATE
Date Functions:
ADDDATE
ADDTIME
CURDATE
CURRENT_DATE
CURRENT_TIME
CURRENT_TIMESTAMP
CURTIME
DATE
DATEDIFF
DATE_ADD
DATE_FORMAT
DATE_SUB
DAY
DAYNAME
DAYOFMONTH
DAYOFWEEK
DAYOFYEAR
EXTRACT
FROM_DAYS
HOUR
LAST_DAY
LOCALTIME
LOCALTIMESTAMP
MAKEDATE
MAKETIME
MICROSECOND
MINUTE
MONTH
MONTHNAME
NOW
PERIOD_ADD
PERIOD_DIFF
QUARTER
SECOND
SEC_TO_TIME
STR_TO_DATE
SUBDATE
SUBTIME
SYSDATE
TIME
TIME_FORMAT
TIME_TO_SEC
TIMEDIFF
TIMESTAMP
TO_DAYS
WEEK
WEEKDAY
WEEKOFYEAR
YEAR
YEARWEEK
Advanced Functions:
BIN
BINARY
CASE
CAST
COALESCE
CONNECTION_ID
CONV
CONVERT
CURRENT_USER
DATABASE
IF
IFNULL
ISNULL
LAST_INSERT_ID
NULLIF
SESSION_USER
SYSTEM_USER
USER
VERSION
SQL Server Functions
String Functions:
ASCII
CHAR
CHARINDEX
CONCAT
Concat with +
CONCAT_WS
DATALENGTH
DIFFERENCE
FORMAT
LEFT
LEN
LOWER
LTRIM
NCHAR
PATINDEX
QUOTENAME
REPLACE
REPLICATE
REVERSE
RIGHT
RTRIM
SOUNDEX
SPACE
STR
STUFF
SUBSTRING
TRANSLATE
TRIM
UNICODE
UPPER
Numeric Functions:
ABS
ACOS
ASIN
ATAN
ATN2
AVG
CEILING
COUNT
COS
COT
DEGREES
EXP
FLOOR
LOG
LOG10
MAX
MIN
PI
POWER
RADIANS
RAND
ROUND
SIGN
SIN
SQRT
SQUARE
SUM
TAN
Date Functions:
CURRENT_TIMESTAMP
DATEADD
DATEDIFF
DATEFROMPARTS
DATENAME
DATEPART
DAY
GETDATE
GETUTCDATE
ISDATE
MONTH
SYSDATETIME
YEAR
Advanced Functions
CAST
COALESCE
CONVERT
CURRENT_USER
IIF
ISNULL
ISNUMERIC
NULLIF
SESSION_USER
SESSIONPROPERTY
SYSTEM_USER
USER_NAME
MS Access Functions
String Functions:
Asc
Chr
Concat with &
CurDir
Format
InStr
InstrRev
LCase
Left
Len
LTrim
Mid
Replace
Right
RTrim
Space
Split
Str
StrComp
StrConv
StrReverse
Trim
UCase
Numeric Functions:
Abs
Atn
Avg
Cos
Count
Exp
Fix
Format
Int
Max
Min
Randomize
Rnd
Round
Sgn
Sqr
Sum
Val
Date Functions:
Date
DateAdd
DateDiff
DatePart
DateSerial
DateValue
Day
Format
Hour
Minute
Month
MonthName
Now
Second
Time
TimeSerial
TimeValue
Weekday
WeekdayName
Year
Other Functions:
CurrentUser
Environ
IsDate
IsNull
IsNumeric
SQL Quick Ref
Insert Multiple Rows in One Statement
Our examples so far have shown the ability to insert a single value with a statement. What if you wanted to insert multiple values?
You could write separate statements:
This can get a bit “wordy” and repetitive. Also, if you’re inserting hundreds or thousands of rows, it can take a bit of time as each statement is processed individually.
Fortunately, there is a better way.
You can insert multiple records with a single SQL INSERT statement.
The way to do this is different with each database vendor. Let’s take a look.
Oracle: Insert Multiple Records
What if you had a few records you wanted to insert?
You could run several different INSERT statements. But, there’s another way to do it.
You can insert several records at once, with a single statement, using the INSERT ALL keyword.
Why would you want to do this? Generally, running a single statement is better for performance than many statements. It can also be easier to write, especially if there are many records to insert.
So, how do you do this?
Let’s see an example.
This will insert three records in a single statement. You can, of course, have many more than three records.
You need to have the SELECT * FROM dual at the end, because the INSERT ALL expects a SELECT statement., and using the DUAL dummy table will allow you to insert many values manually in one statement.
SQL Server Insert Multiple Rows
Inserting multiple records in a single statement is easier in SQL Server as it requires fewer words. It’s the same as MySQL and PostgreSQL.
You can separate each row with a comma outside the brackets.
For example:
There are a few things to notice here.
The column names are only specified once, after the table name, which is the same as if you were inserting a single record.
Several rows are mentioned after the VALUES keyword, and they are separated by a comma.
Running this statement will cause all three rows to be inserted into the table at once.
Also, you can only INSERT up to 1,000 rows in a single statement. Any more than that and you can either run a second statement or change your approach to loading data.
MySQL Insert Multiple Rows
The way to insert multiple rows is the same as SQL Server and PostgreSQL, where you specify the column names once and separate each row in the VALUES clause with a comma.
For example:
There are a few things to notice here.
The column names are only specified once, after the table name, which is the same as if you were inserting a single record.
Several rows are mentioned after the VALUES keyword, and they are separated by a comma.
Running this statement will cause all three rows to be inserted into the table at once.
What’s the maximum number of rows you can insert in one statement in MySQL? There is no defined limit like SQL Server. However, if the size of the statement is bigger than the property of “max_allowed_packet”, then you’ll get an error.
PostgreSQL Insert Multiple Rows
The way to insert multiple rows is the same as SQL Server and MySQL, where you specify the column names once and separate each row in the VALUES clause with a comma.
For example:
There are a few things to notice here.
The column names are only specified once, after the table name, which is the same as if you were inserting a single record.
Several rows are mentioned after the VALUES keyword, and they are separated by a comma.
Running this statement will cause all three rows to be inserted into the table at once.
INSERT INTO SELECT Query
Suppose we want to insert the result-set that is generated by another SELECT query in the table, we can use INSERT INTO SELECT Query. The syntax is the following:
|
1 |
INSERTINTOdestination_table_name(column_1,column_2) SELECT column_1,column_2 FROM source_table WHERE condition; |
As you can see in the syntax, instead of using the VALUES clause, we have used the SELECT query. Here SELECT statement retrieves the data from another table or by joining different tables. This query is very helpful when you want to create a backup of a specific table.
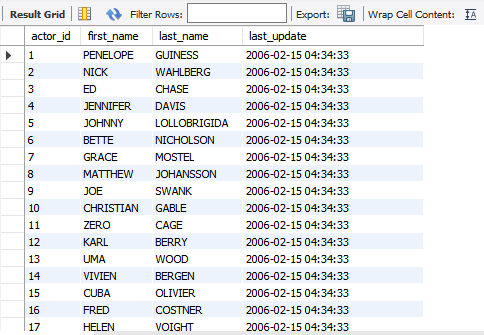
To demonstrate the scenario, I am going to use the actor table of the sakila database. I have created another table named actor_backup. The table structure of the table actor_backup and actor is the same. The only change I made is that I have dropped the foreign keys and other constraints of the actor_backup table.
The table can be created by executing the following query.
|
1 |
CREATETABLEactor_backup ( actor_idsmallint, first_namevarchar(45)NOTNULL, last_namevarchar(45)NOTNULL, last_updatetimestampNOTNULLDEFAULTCURRENT_TIMESTAMPONUPDATECURRENT_TIMESTAMP) |
Now, to insert data from the actor table to the actor_backup table, execute the following query.
| 1 | insertintoactor_backupselectactor_id,first_name,last_name,last_updatefromactor; |
Execute the following SELECT query to verify that data has been inserted successfully.
| 1 | Select*fromactor_backup; |
Output:
Examples
=> INSERT INTO t1 VALUES (101, 102, 103, 104);
=> INSERT INTO customer VALUES (10, 'male', 'DPR', 'MA', 35);
=> INSERT INTO retail.t1 (C0, C1) VALUES (1, 1001);
=> INSERT INTO films SELECT * FROM tmp_films WHERE date_prod < '2004-05-07';
Vertica does not support subqueries or nested expressions as the target of an statement. For example, the following query returns an error message:
=> INSERT INTO t1 (col1, col2) VALUES ('abc', (SELECT mycolumn FROM mytable));
ERROR 4821:  Subqueries not allowed in target of insert
You can rewrite the above query as follows:
=> INSERT INTO t1 (col1, col2) (SELECT 'abc', mycolumn FROM mytable);
 OUTPUT
--------
      0
(1 row)
The following example shows how to use with flex tables:
=> CREATE FLEX TABLE flex1();
 CREATE TABLE
=> INSERT INTO flex1(a,b) VALUES (1, 'x');
 OUTPUT
--------
      1
(1 row)
=> SELECT MapToString(__raw__) FROM flex1;
           MapToString
---------------------------------
{
"a" : "1",
"b" : "x"
}
(1 row)
The next example shows how to use with flex tables:
=> CREATE FLEX TABLE flex2();
 CREATE TABLE
=> INSERT INTO flex2(a, b) SELECT a, b, '2016-08-10 11:10' c,      'Hello' d, 3.1415 e, f from flex1;
 OUTPUT
--------
      1
(1 row)
=> SELECT MapToString(__raw__) FROM flex2;
           MapToString
---------------------------------
{"a" : "1","b" : "x","c" : "2016-08-10","d" : "Hello","e" : 3.1415,"f" : null}(1 row)
Was this topic helpful?
Yes
No
Simple INSERT query example
Suppose I want to insert the first name and last name of the employee. Run the following query:
| 1 | INSERTINTOtblemployee (employee_first_name,employee_last_name)values(‘Nisarg’,’Upadhyay’) |
Once the query executed successfully, let us run the SELECT query to verify the data. Execute the following query:
| 1 | select*fromtblEmployee; |
Following is the screenshot of the output:

As you can see in the above screenshot of the output, the row has been inserted successfully, and the values of their corresponding columns are also inserted correctly. In the INSERT query, I have specified the values of the first_name and last_name column, but we have set the default value of the department_id column, so if we do not specify the value of the column, it inserts the default value. The employee_id column is auto_increment so that it will be incremented automatically.
Example — Using VALUES keyword
The simplest way to create a SQL Server INSERT query to list the values using the VALUES keyword.
For example:
INSERT INTO employees
(employee_id, last_name, first_name)
VALUES
(10, 'Anderson', 'Sarah');
This SQL Server INSERT statement would result in one record being inserted into the employees table. This new record would have an employee_id of 10, a last_name of ‘Anderson’, and a first_name of ‘Sarah’.
You can also use this syntax to insert more than one record at a time. For example:
INSERT INTO employees
(employee_id, last_name, first_name)
VALUES
(10, 'Anderson', 'Sarah'),
(11, 'Johnson', 'Dale');
This INSERT example shows how to insert more than one record using the VALUES keyword. In this example, two records are inserted into the employees table. The first record has an employee_id of 10, a last_name of ‘Anderson’, and a first_name of ‘Sarah’. The second record has an employee_id of 11, a last_name of ‘Johnson’, and a first_name of ‘Dale’.
This would be equivalent to the following two INSERT statements:
INSERT INTO TABLE using Excel
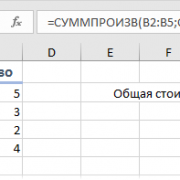
In many cases, you’ll need to run multiple SQL statements based on the dataset provided to you. This stands not only for the INSERT INTO TABLE statement but also for UPDATE and DELETE statements. There is no point in typing these statements manually, but you should rather go with a smarter approach – prepare formulas (or a script) that will automate this part. In such situations, I prefer using Excel and formulas.
Note: Personally, in the context of databases, I find Excel very useful when I need to create multiple statements and when presenting results and/or creating dashboards.
Let’s take a look at these formulas:
The formula used to insert the first country (Germany) is:
| 1 | =»INSERTINTOcountry (country_name,country_name_eng,country_code)VALUES(‘» & B2 & «‘,'» & C2 & «‘,'» & D2 & «‘);» |
The formula used to insert the first city (Berlin) is:
| 1 | =»INSERTINTOcity (city_name,lat,long,country_id)VALUES(‘» & B2 & «‘,»&C2&»,»&D2&»,»&E2&»);» |
Feel free to use these formulas to automate your tasks. We’ll use a similar approach later when we are running multiple UPDATE and DELETE statements (and even when creating SELECT statements).
Вставка строк, некоторые из которых уже существуют в целевой таблице
Существование строк определяется по значению уникальных ключей. В зависимости от ситуации мы можем выбрать разные способы поведения при совпадении значений уникальных столбцов.
Игнорирование INSERT IGNORE INTO
Например если мы вставляем строку с PK = 1, и при этом в таблице уже есть PK = 1 то MySQL выдаст ошибку:
/* ERROR 1062 (23000): Duplicate entry '1' for key 'PRIMARY' */
Выполнение запроса на этом прервется, однако нам в некоторых случаях хотелось бы просто вставить данные, игнорируя ошибки. В этом нам поможет INSERT IGNORE INTO:
INSERT IGNORE INTO table1 (a, b, c) VALUES
    (1, 222, 333),
    (2, 555, 666),
    (3, 555, 333);
Просто добавляем IGNORE в наш запрос и ошибки будут игнорироваться
Вставка с заменой существующих значений REPLACE INTO
REPLACE работает также INSERT, но если совпадают уникальные ключи, то старая строка (или строки!) удаляется до вставки новой.
В таком случае наш пример выглядит следующим образом:
REPLACE INTO table1 (a, b, c) VALUES
    (1, 222, 333),
    (2, 555, 666),
    (3, 555, 333);
Обновление некоторых полей, при существовании строк ON DUPLICATE KEY UPDATE
При совпадении ключей, мы можем также заменить некоторые или все поля в строке.
Наш запрос будет выглядеть так:
INSERT INTO table1 (a,b,c) VALUES (1,2,3)
ON DUPLICATE KEY UPDATE c=VALUES(c);
В данном примере если у нас какой-то уникальный ключ совпадает, то мы не производим вставку, а обновляем существующую строку или строки путем присваивания столбцу «c» значения, которое у нас перечислено в VALUES.
Иными словами, если ключ совпадает, то мы просто обновим данные столбца «с» а остальные столбцы трогать не будем.
Иногда нам нужно при совпадении ключей обновить все значения. Этом можно сделать просто перечислив все столбцы:
INSERT INTO table1 (a,b,c) VALUES (1,2,3)
ON DUPLICATE KEY UPDATE a=VALUES(a), b=VALUES(b), c=VALUES(c);
При обновлении столбцов мы также можем использовать разные выражения, например:
INSERT INTO table1 (a,b,c) VALUES (1,2,3),(4,5,6)
ON DUPLICATE KEY UPDATE c=VALUES(a)+VALUES(b);
Подробнее про ON DUPLICATE KEY UPDATE
SQL Учебник
SQL ГлавнаяSQL ВведениеSQL СинтаксисSQL SELECTSQL SELECT DISTINCTSQL WHERESQL AND, OR, NOTSQL ORDER BYSQL INSERT INTOSQL Значение NullSQL Инструкция UPDATESQL Инструкция DELETESQL SELECT TOPSQL MIN() и MAX()SQL COUNT(), AVG() и …SQL Оператор LIKESQL ПодстановочныйSQL Оператор INSQL Оператор BETWEENSQL ПсевдонимыSQL JOINSQL JOIN ВнутриSQL JOIN СлеваSQL JOIN СправаSQL JOIN ПолноеSQL JOIN СамSQL Оператор UNIONSQL GROUP BYSQL HAVINGSQL Оператор ExistsSQL Операторы Any, AllSQL SELECT INTOSQL INSERT INTO SELECTSQL Инструкция CASESQL Функции NULLSQL ХранимаяSQL Комментарии
SQL Справочник
SQL Ключевые слова
ADD
ADD CONSTRAINT
ALTER
ALTER COLUMN
ALTER TABLE
ALL
AND
ANY
AS
ASC
BACKUP DATABASE
BETWEEN
CASE
CHECK
COLUMN
CONSTRAINT
CREATE
CREATE DATABASE
CREATE INDEX
CREATE OR REPLACE VIEW
CREATE TABLE
CREATE PROCEDURE
CREATE UNIQUE INDEX
CREATE VIEW
DATABASE
DEFAULT
DELETE
DESC
DISTINCT
DROP
DROP COLUMN
DROP CONSTRAINT
DROP DATABASE
DROP DEFAULT
DROP INDEX
DROP TABLE
DROP VIEW
EXEC
EXISTS
FOREIGN KEY
FROM
FULL OUTER JOIN
GROUP BY
HAVING
IN
INDEX
INNER JOIN
INSERT INTO
INSERT INTO SELECT
IS NULL
IS NOT NULL
JOIN
LEFT JOIN
LIKE
LIMIT
NOT
NOT NULL
OR
ORDER BY
OUTER JOIN
PRIMARY KEY
PROCEDURE
RIGHT JOIN
ROWNUM
SELECT
SELECT DISTINCT
SELECT INTO
SELECT TOP
SET
TABLE
TOP
TRUNCATE TABLE
UNION
UNION ALL
UNIQUE
UPDATE
VALUES
VIEW
WHERE
MySQL Функции
Функции строк
ASCII
CHAR_LENGTH
CHARACTER_LENGTH
CONCAT
CONCAT_WS
FIELD
FIND_IN_SET
FORMAT
INSERT
INSTR
LCASE
LEFT
LENGTH
LOCATE
LOWER
LPAD
LTRIM
MID
POSITION
REPEAT
REPLACE
REVERSE
RIGHT
RPAD
RTRIM
SPACE
STRCMP
SUBSTR
SUBSTRING
SUBSTRING_INDEX
TRIM
UCASE
UPPER
Функции чисел
ABS
ACOS
ASIN
ATAN
ATAN2
AVG
CEIL
CEILING
COS
COT
COUNT
DEGREES
DIV
EXP
FLOOR
GREATEST
LEAST
LN
LOG
LOG10
LOG2
MAX
MIN
MOD
PI
POW
POWER
RADIANS
RAND
ROUND
SIGN
SIN
SQRT
SUM
TAN
TRUNCATE
Функции дат
ADDDATE
ADDTIME
CURDATE
CURRENT_DATE
CURRENT_TIME
CURRENT_TIMESTAMP
CURTIME
DATE
DATEDIFF
DATE_ADD
DATE_FORMAT
DATE_SUB
DAY
DAYNAME
DAYOFMONTH
DAYOFWEEK
DAYOFYEAR
EXTRACT
FROM_DAYS
HOUR
LAST_DAY
LOCALTIME
LOCALTIMESTAMP
MAKEDATE
MAKETIME
MICROSECOND
MINUTE
MONTH
MONTHNAME
NOW
PERIOD_ADD
PERIOD_DIFF
QUARTER
SECOND
SEC_TO_TIME
STR_TO_DATE
SUBDATE
SUBTIME
SYSDATE
TIME
TIME_FORMAT
TIME_TO_SEC
TIMEDIFF
TIMESTAMP
TO_DAYS
WEEK
WEEKDAY
WEEKOFYEAR
YEAR
YEARWEEK
Функции расширений
BIN
BINARY
CASE
CAST
COALESCE
CONNECTION_ID
CONV
CONVERT
CURRENT_USER
DATABASE
IF
IFNULL
ISNULL
LAST_INSERT_ID
NULLIF
SESSION_USER
SYSTEM_USER
USER
VERSION
SQL Server функции
Функции строк
ASCII
CHAR
CHARINDEX
CONCAT
Concat with +
CONCAT_WS
DATALENGTH
DIFFERENCE
FORMAT
LEFT
LEN
LOWER
LTRIM
NCHAR
PATINDEX
QUOTENAME
REPLACE
REPLICATE
REVERSE
RIGHT
RTRIM
SOUNDEX
SPACE
STR
STUFF
SUBSTRING
TRANSLATE
TRIM
UNICODE
UPPER
Функции чисел
ABS
ACOS
ASIN
ATAN
ATN2
AVG
CEILING
COUNT
COS
COT
DEGREES
EXP
FLOOR
LOG
LOG10
MAX
MIN
PI
POWER
RADIANS
RAND
ROUND
SIGN
SIN
SQRT
SQUARE
SUM
TAN
Функции дат
CURRENT_TIMESTAMP
DATEADD
DATEDIFF
DATEFROMPARTS
DATENAME
DATEPART
DAY
GETDATE
GETUTCDATE
ISDATE
MONTH
SYSDATETIME
YEAR
Функции расширений
CAST
COALESCE
CONVERT
CURRENT_USER
IIF
ISNULL
ISNUMERIC
NULLIF
SESSION_USER
SESSIONPROPERTY
SYSTEM_USER
USER_NAME
MS Access функции
Функции строк
Asc
Chr
Concat with &
CurDir
Format
InStr
InstrRev
LCase
Left
Len
LTrim
Mid
Replace
Right
RTrim
Space
Split
Str
StrComp
StrConv
StrReverse
Trim
UCase
Функции чисел
Abs
Atn
Avg
Cos
Count
Exp
Fix
Format
Int
Max
Min
Randomize
Rnd
Round
Sgn
Sqr
Sum
Val
Функции дат
Date
DateAdd
DateDiff
DatePart
DateSerial
DateValue
Day
Format
Hour
Minute
Month
MonthName
Now
Second
Time
TimeSerial
TimeValue
Weekday
WeekdayName
Year
Другие функции
CurrentUser
Environ
IsDate
IsNull
IsNumeric
SQL ОператорыSQL Типы данныхSQL Краткий справочник
Insert Data into SQL Server Using an Explicit Column List
Let’s begin by diving straight into some of the simplest of syntaxes in T-SQL: The INSERT statement. The most common way to insert rows into a table is by doing so with an INSERT statement where we explicitly cite the entire column list prior to providing the values:
|
1 |
INSERTINTOdbo.account (account_name,account_start_date,account_address,account_type,account_create_timestamp,account_notes,is_active) VALUES (‘Ed»s Account’, ‘5/1/2019’, ‘Ed»s Address’, ‘TEST’, GETUTCDATE(), ‘This is a test account to model this data.’, ); |
In this example, we provide a complete column list and use the VALUES syntax to list out scalar values to insert into the table. If desired, we can insert multiple rows via this syntax, separating each row by a comma.
We also have the option of omitting columns from the column and SELECT lists. This can be used for columns that allow NULL (and we want to be left NULL), or for columns that have default constraints defined on them (and we want the column to accept the default value). The following example shows an account insertion where we omit the account_notes column:
|
1 |
INSERTINTOdbo.account (account_name,account_start_date,account_address,account_type,account_create_timestamp,is_active) VALUES (‘Initech’, ‘2/19/1999’, ‘4120 Freidrich Ln.’, ‘LIVE’, GETUTCDATE(), 1); |
After the two above insertions, we can view the resulting data and note that the results are what we expect:

SQL Server allowed us to omit the account_notes column and in doing so assigned NULL in its place. Let’s add a default constraint to this column:
| 1 | ALTERTABLEdbo.accountADDCONSTRAINTDF_account_account_notesDEFAULT(‘NONE PROVIDED’)FORaccount_notes; |
With a default constraint on the column, we may test another INSERT where we intentionally leave out the account_notes column:
|
1 |
INSERTINTOdbo.account (account_name,account_start_date,account_address,account_type,account_create_timestamp,is_active) SELECT ‘Dinosaur Corp’, ‘1/1/2003’, ‘The Triassic Time Period’, ‘DEMO’, GETUTCDATE(), 1; |
The results show us how the new row looks in our table:

We can see that the default value from the constraint was applied to account_notes, as expected. Creating a default constraint can be useful for ensuring that a column can be made NOT NULL and always be assigned a value. It is also useful when we wish to have a column that typically is not assigned a value, but requires one for an application or reporting purpose. A default constraint should never be used to generate placeholder, fake, or obfuscated data. For example, -1 is a poor choice for an integer column and 1/1/1900 is a lousy choice for a date column as each provides confusing meaning that is not intuitive to a developer or someone consuming this data.
The primary benefit of inserting data with an explicit column list are that you document exactly what columns are being populated, and what data is being put into each column. If a column is left off the list, then it will be made NULL. If a NOT NULL column with no default constraint is left off of the list, an error will be thrown, similar to this:

Similarly, if you accidentally leave off a column from the column list, you’ll get this error:

As a result, the explicitly provided column list makes it hard to accidentally leave columns out.
This syntax has a downside, though, and that is maintainability in scenarios where table schema changes often and there is a desire to always SELECT *. If you are dumping data to an output table and do not care about column order, typing, or quantity, then having to always adjust the column list to match the SELECT details may be a hassle and not worth the effort.
Insert Data SQL Server with OUTPUT INSERTED
A bonus way we can generate data is via an existing statement. When we execute any write operation, we may output data from before or after the change to another table. Here is an example of how this looks:
|
1 |
CREATETABLE#account_ids (account_idINTNOTNULLPRIMARYKEYCLUSTERED); UPDATEaccount SETis_active=1 OUTPUTINSERTED.account_id INTO#account_ids FROMdbo.account WHEREaccount_type=’LIVE’; SELECT*FROM#account_ids; DROPTABLE#account_ids; |
The goal above is to update all accounts of type “LIVE” to be active. We also want to return the account_id for each account that was updated. Using OUTPUT INSERTED allows us to accomplish both tasks in a single set-based solution. The results show us which IDs were affected by the update statement:
INSERTED will contain all columns in the table as they appear after changes have been applied. Similarly, DELETED will contain the previous versions. We can mix and match these for maximum effect:
|
1 |
CREATETABLE#account_ids (account_idINTNOTNULLPRIMARYKEYCLUSTERED,is_active_previousBITNOTNULL,is_active_currentBITNOTNULL); UPDATEaccount SETis_active= OUTPUTINSERTED.account_id, DELETED.is_active, INSERTED.is_active INTO#account_ids FROMdbo.account WHEREaccount_type=’LIVE’; SELECT*FROM#account_ids; DROPTABLE#account_ids; |
The results show that we not only captured the account IDs, but also the previous and new values for the is_active flag. This is a huge convenience as we can use OUTPUT INSERTED in INSERT, DELETE, UPDATE, and MERGE statements to quickly pull before & after data for use in additional processing.
This is a far superior solution to iteration and/or using SCOPE_IDENTITY() and is the only easy way to capture data in this fashion with so little code. OUTPUT INSERTED is a great method for getting before & after data from DML statements. It is also useful for collecting a list of rows that were altered in a given TSQL statement, so we can take additional actions or report on them as needed.
How to perform a simple Insert
Let’s start inserting the data into this simple department table. First, use the name of the table and then inside parenthesis, the name of the columns and then type in the values. So, name the columns that we are going to type in the values.
|
1 |
CREATETABLEdepartment (dnoINT PRIMARYKEY, dnameVARCHAR(20)NOTNULL, locVARCHAR(50)NOTNULL ); |
The following SQL Insert into statement inserts a row into the department. The columns dno, dname, and loc are listed and values for those columns are supplied. The order is also maintained in the same way as the columns in the table
|
1 |
INSERTINTOdepartment (dno, dname, loc ) (10, ‘ENGINEERING’, ‘New York’ ); |
Practice Exercise #2:
Based on the contacts and customers table, insert into the contacts table all customers who reside in the state of ‘Florida’.
CREATE TABLE contacts
( contact_id number(10) not null,
  last_name varchar2(50) not null,
  first_name varchar2(50) not null,
  address varchar2(50),
  city varchar2(50),
  state varchar2(20),
  zip_code varchar2(10),
  CONSTRAINT contacts_pk PRIMARY KEY (contact_id)
);

CREATE TABLE customers
( customer_id number(10) not null,
  last_name varchar2(50) not null,
  first_name varchar2(50) not null,
  address varchar2(50),
  city varchar2(50),
  state varchar2(20),
  zip_code varchar2(10),
  CONSTRAINT customers_pk PRIMARY KEY (customer_id)
);
Solution for Practice Exercise #2:
The following Oracle INSERT statement would insert this record into the suppliers table:
INSERT INTO contacts
(contact_id, last_name, first_name, address, city, state, zip_code)
SELECT customer_id, last_name, first_name, address, city, state, zip_code
FROM customers
WHERE state = 'Florida';
Since the number of fields in the contacts and customers table are the same and the fields are listed in the same order, you could write the solution as follows (though it is generally better practice to list the column names in case the table definitions change):
INSERT INTO contacts
SELECT *
FROM customers
WHERE state = 'Florida';
Примеры SQL INSERT INTO SELECT
Следующая инструкция SQL копирует «Suppliers» в «Customers» (столбцы, которые не заполнены данными, будут содержать NULL):
Пример
INSERT INTO Customers (CustomerName,
City, Country)
SELECT SupplierName, City, Country FROM Suppliers;
Следующая инструкция SQL копирует «Suppliers» в «Customers» (заполните все столбцы):
Пример
INSERT INTO Customers (CustomerName, ContactName, Address, City, PostalCode,
Country)SELECT SupplierName, ContactName, Address, City, PostalCode,
Country FROM Suppliers;
Следующая инструкция SQL копирует только немецких поставщиков в раздел «Customers»:
Пример
INSERT INTO Customers (CustomerName,
City, Country)
SELECT SupplierName, City, Country FROM SuppliersWHERE Country=’Germany’;