Bootstrap 5 login form component
Содержание:
- Best Bootstrap Contact Form Templates [Free download]
- Custom File Upload
- More Bootstrap Form Templates for Free use
- Валидация формы
- Quick start
- Supported Form Controls
- Multiple Inputs and Helpers
- Sass
- Bootstrap Radio Buttons
- Anatomy
- Static Control
- Other Tips and Edge Cases
- Флажки и переключатели
- Disabled forms
- Глобально важно
- Forms
- Доступность
- Disabled forms
- Auto-layout columns
- Responsive classes
- Community
- Form Validation
- Custom Select Menu Size
- Community
Best Bootstrap Contact Form Templates [Free download]
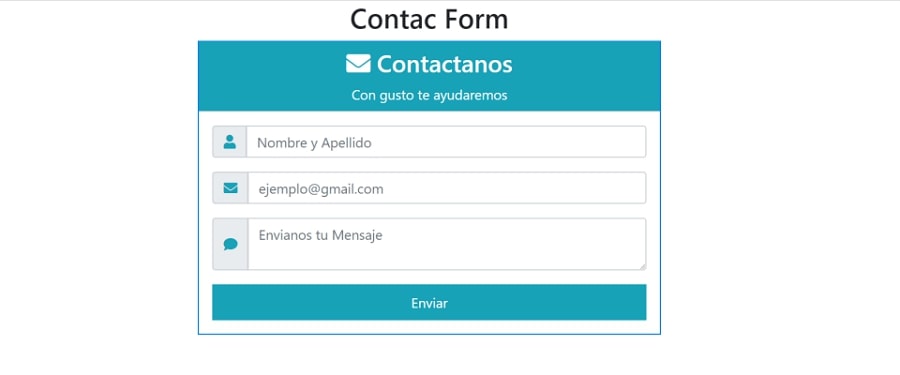
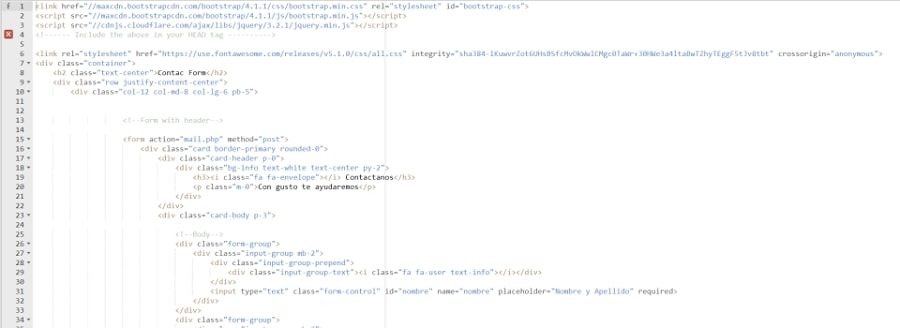
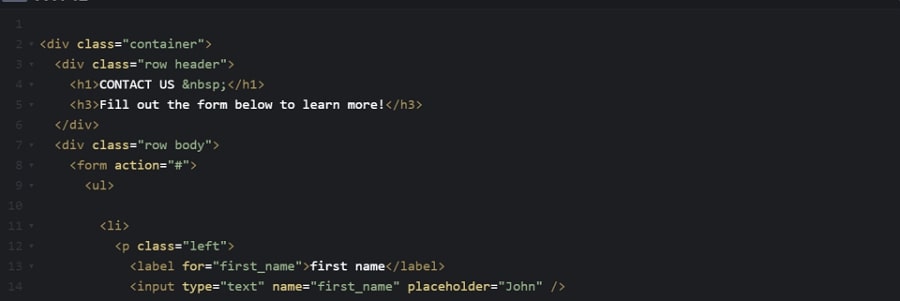
18. Contact Form
Designer: Danlouis9701
This contact form based on Bootstrap can be used on any website. It has a special text input field to allow for open-ended comment.
19. Bootstrap Contact Form
Designer: Kshiti06
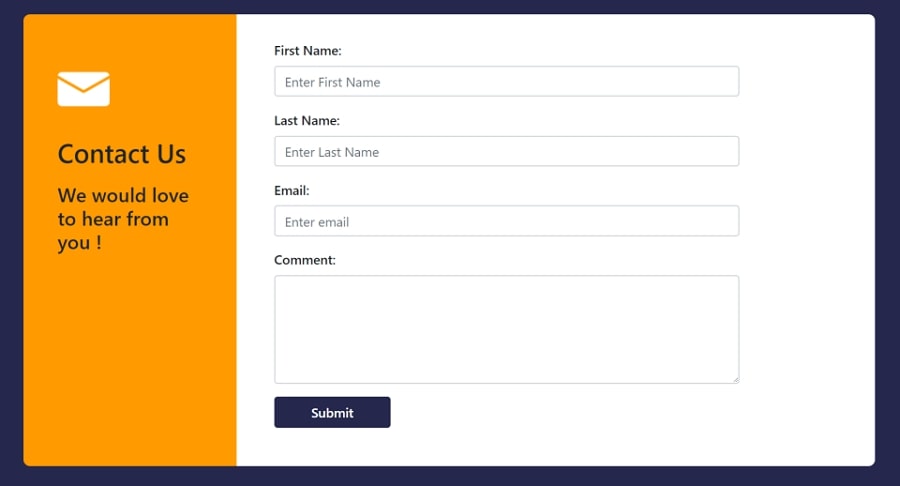
This form uses yellow and white to create a nice contrast. It looks more appealing than all-white contact forms.

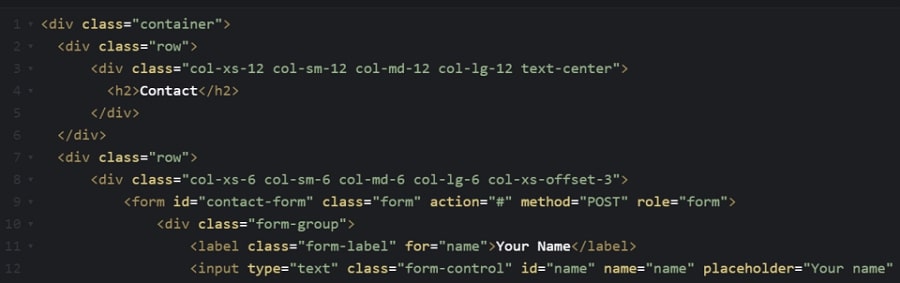
20. Bootstrap Contact Form
Designer: Kshiti06
It uses a gradient blue color as the background, which is a perfect complement to an all-white contact form. It uses placeholders to inform you of what you should input.

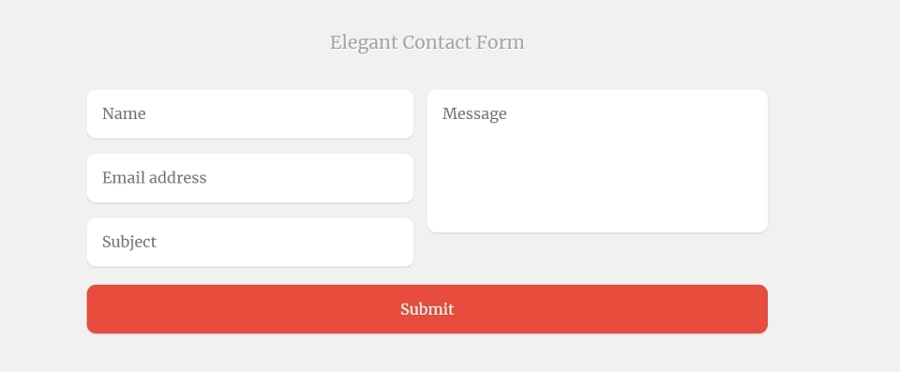
21. Contact Form — One page
Designer: Katya
It has a custom styled button with a nice icon. In addition, the rounded form spaces make it display perfectly on any web or mobile screen. The typography on the header is very powerful.

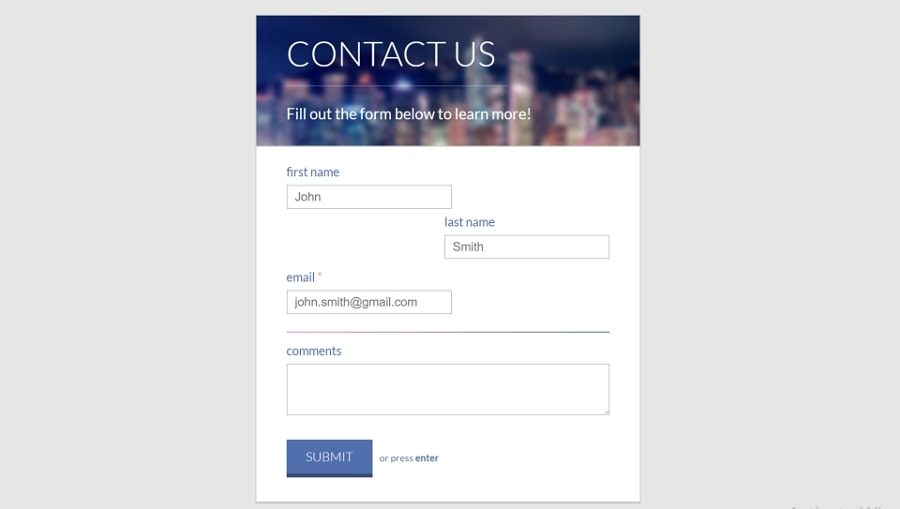
22. Contact Us Form with Validation
Designer: Mirchu
This is an all-white contact form with a custom-styled button with a solid green color. Bootstrap form validation is used in this form.

23. Bootstrap 3 Contact Form with Validation
Designer: Jay
- Built with Bootstrap 3
- Field validation with Bootstrap validator
This is a powerful contact form with multiple items, including input fields, checkboxes, radio buttons and a submit button.
Designer: Mark Murray
This form features:
- Round edges
- Large textboxes
- Custom styled submit button
25. Clean Contact Form
Designer: Nick haskell
This form features:
- A fancy, concise, and delightful header
- Custom styled submit button
- The image and text encourages visitors to get in touch with you.
- Responsive form design
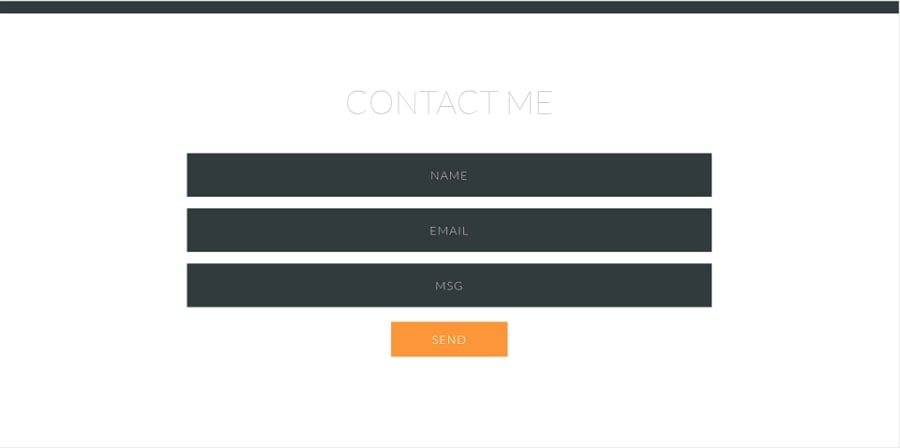
Designer: Stefan Rusu
Form features:
- Interactive layout
- Full-page contact form
- Simple and useful

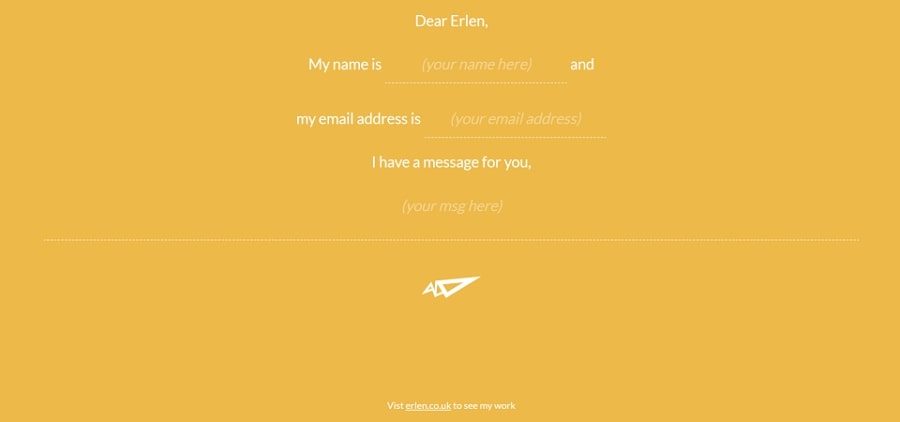
27. Quick Minimal Contact Form
Designer: Erlen
Form features:
- Clean color scheme
- Custom styled submit button
- Placeholder to inform what you should input
Designer: Chris Holder
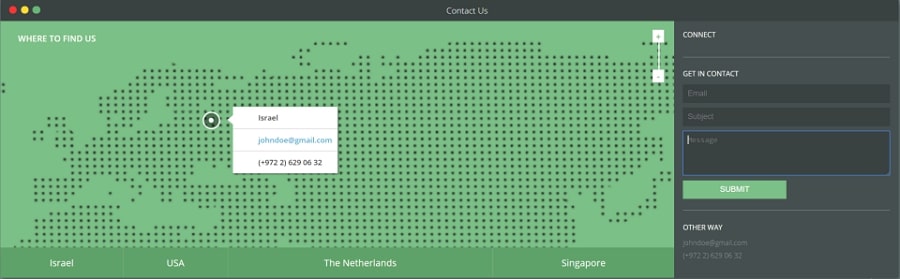
29. Responsive Contact Form with Map
Designer: Lentie Ward
Form features:
- Map background to provide an accurate reference of where you are
- Asymmetrical layout
- Excellent color scheme
- Large textboxes
30. Transparent Contact Form
Designer: Luis M Ruiz
Form features:
- Large textboxes
- Fully responsive contact form design
- Support customization
- Confiscated design

If you need more resources, there are 12 Best Free Html5 Contact Form & Contact Us Page Templates you shouldn’t miss.
Custom File Upload
To create a custom file upload, wrap a container element with a
class of around the input with type=»file». Then add the to it.
Tip: If you use labels for accompanying text, add the class to it.
Note that the value of the for attribute should match the id of the checkbox:
Choose file
Note that you also have to include some jQuery code if you want the name of the file to appear when you select a specific file:
Example
<form> <div class=»custom-file»> <input
type=»file» class=»custom-file-input» id=»customFile»>
<label class=»custom-file-label» for=»customFile»>Choose file</label>
</div></form><script>// Add the following code if
you want the name of the file appear on select
$(«.custom-file-input»).on(«change», function() { var fileName =
$(this).val().split(«\\»).pop();
$(this).siblings(«.custom-file-label»).addClass(«selected»).html(fileName);
});</script>
❮ Previous
Next ❯
More Bootstrap Form Templates for Free use
Designer: Asanti82
Form features:
- Functional form design
- Fully responsive

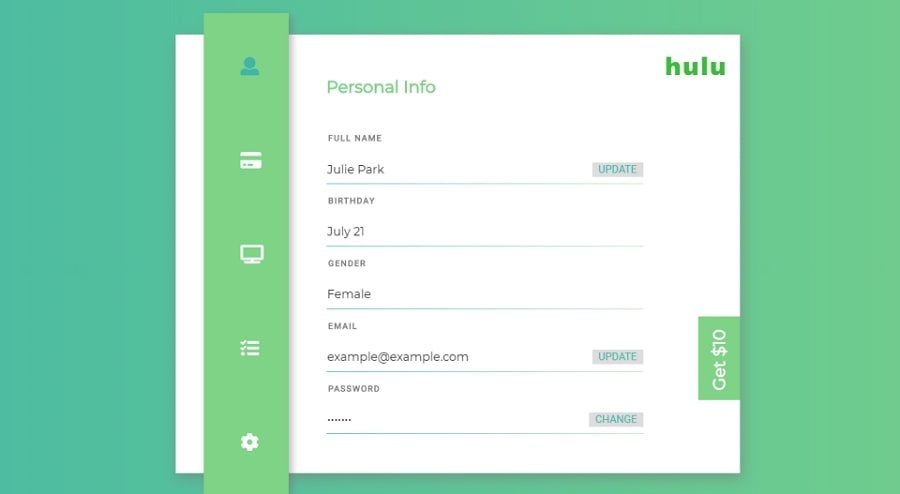
Designer: Julie Park
Form features:
- Adaptable to any web-page sidebar
- Nice color scheme
- Interactive elements
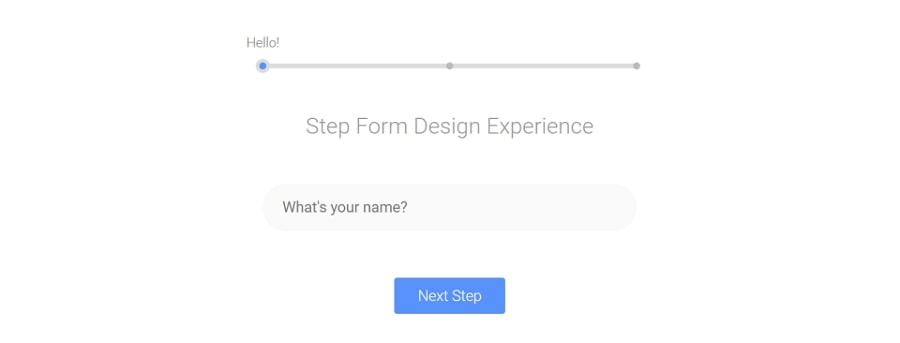
33. Step-by-Step Form Interaction
Designer: Bhakti Al Akbar
Form features:
- Step by step guidance
- Quickly get feedback from the user
- Custom styled submit button
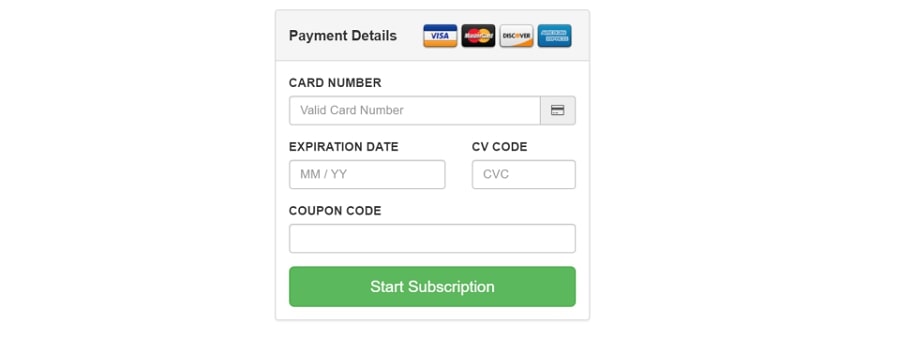
Designer: llgruff
Form features:
Fancy header with available cards
Designer: Caspian Seagull
Form features:
- Consistent animation
- Interactive layout
- Large textboxes

Designer: Alessandro Falchi
Form features:
- Sliding label effect
- Interactive layout

Designer: Andy Tran
Form features:
- Material inspired login form
- 2 panels: log in panel and registration panel

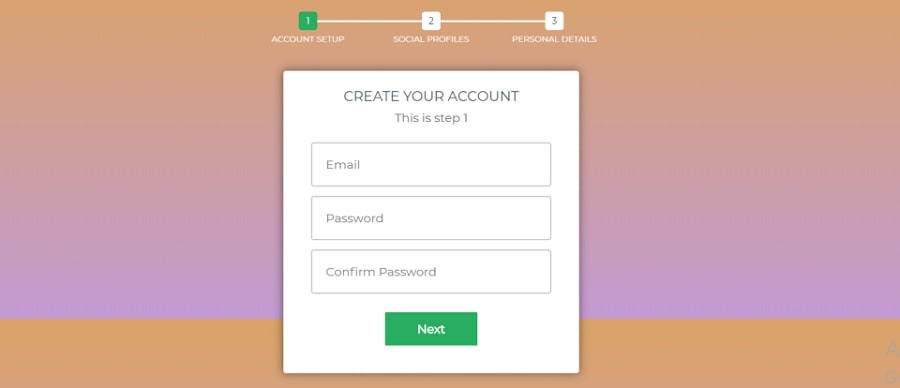
38. Multi-Step Form with Progress Bar Using jQuery and CSS3
Designer: Eric
Form features:
- Smaller logic sections
- Multiple-step form with a cool progress bar
- Suitable for registration, checkout, profile fillups and 2-factor authentication logins
39. Sign-Up/Login Form
Designer: Eric
Form features:
- Easy to switch from sign up to log in
- Solid color buttons
- Four input areas
- Tabs and floating form labels

Валидация формы
Давайте начнем с установки валидатора после ввода данных формы обратной связи AJAX PHP. Перейдите в файл scripts.js и отредактируйте первый фрагмент кода, который вызывает функцию SubmitForm() после того, как данные формы отправлены. Его нужно изменить следующим образом:
$("#contactForm").validator().on("submit", function (event) {
    if (event.isDefaultPrevented()) {
        // обработка ошибки формы...
    } else {
        // все в порядке!
        event.preventDefault();
        submitForm();
    }
});
Этот новый фрагмент кода проверяет, нашел ли Bootstrap Validator проблемы и остановил ли работу кода. Если нет, мы продолжаем выполнение действий в стандартном режиме. Нам все еще нужно исключить действие по умолчанию (перезагрузку страницы без заполнения формы) из сценария представления данных формы.
Теперь, если мы нажмем кнопку отправки данных формы, не заполнив все поля, пустые будут выделяться красным цветом:

В процессе добавления валидации мы заблокировали родную валидацию HTML5. Можно добавить в валидацию дополнительный контекст, включив сообщения об ошибках. Bootstrap Validator имеет удобную функцию, позволяющую отобразить сообщения об ошибке по каждому из полей. Чтобы добавить их, нужно дополнить разметку HTML.
Внутри каждой form-group под полем ввода данных нужно разместить следующий HTML-код:
<div class="help-block with-errors"></div>
В качестве примера ниже приведен дополнительный div, добавляемый полям имени и адреса электронной почты:
<div class="row">
    <div class="form-group col-sm-6">
        <label for="name" class="h4">Name</label>
        <input type="text" class="form-control" id="name" placeholder="Enter name" required>
        <div class="help-block with-errors"></div>
    </div>
    <div class="form-group col-sm-6">
        <label for="email" class="h4">Email</label>
        <input type="email" class="form-control" id="email" placeholder="Enter email" required>
        <div class="help-block with-errors"></div>
    </div>
</div>
Теперь при повторной отправке данных AJAX JQuery формы будет выводиться сообщение об ошибке, если поля формы не были заполнены: “Please fill in this field.”. Добавив data-атрибут для вводимых данных под названием “data-error”, можно включить пользовательское сообщение об ошибке.
Например:
<input type="input" data-error="Новое сообщение об ошибке">

Quick start
Looking to quickly add Bootstrap to your project? Use jsDelivr, a free open source CDN. Using a package manager or need to download the source files? Head to the downloads page.
JS
Many of our components require the use of JavaScript to function. Specifically, they require our own JavaScript plugins and Popper. Place one of the following s near the end of your pages, right before the closing tag, to enable them.
Bundle
Include every Bootstrap JavaScript plugin and dependency with one of our two bundles. Both and include Popper for our tooltips and popovers. For more information about what’s included in Bootstrap, please see our section.
Separate
If you decide to go with the separate scripts solution, Popper must come first (if you’re using tooltips or popovers), and then our JavaScript plugins.
Components
Curious which components explicitly require our JavaScript and Popper? Click the show components link below. If you’re at all unsure about the general page structure, keep reading for an example page template.
Show components requiring JavaScript
- Alerts for dismissing
- Buttons for toggling states and checkbox/radio functionality
- Carousel for all slide behaviors, controls, and indicators
- Collapse for toggling visibility of content
- Dropdowns for displaying and positioning (also requires Popper)
- Modals for displaying, positioning, and scroll behavior
- Navbar for extending our Collapse plugin to implement responsive behavior
- Toasts for displaying and dismissing
- Tooltips and popovers for displaying and positioning (also requires Popper)
- Scrollspy for scroll behavior and navigation updates
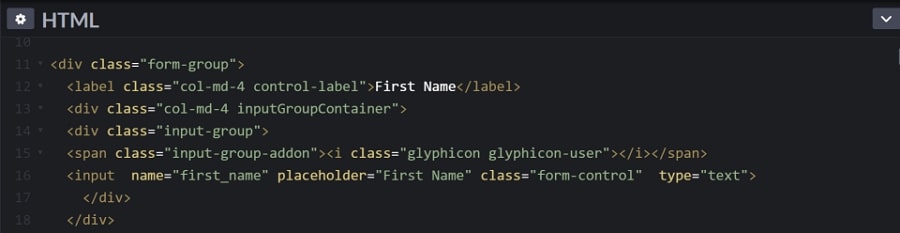
Supported Form Controls
Bootstrap natively supports the most common form controls mainly input, textarea, checkbox, radio, and select.
Inputs
<form role = "form">

   <div class = "form-group">
      <label for = "name">Label</label>
      <input type = "text" class = "form-control" placeholder = "Text input">
   </div>

</form>
Textarea
The textarea is used when you need multiple lines of input. Change rows attribute as necessary (fewer rows = smaller box, more rows = bigger box).
<form role = "form">

   <div class = "form-group">
      <label for = "name">Text Area</label>
      <textarea class = "form-control" rows = "3"></textarea>
   </div>

</form>
CheckBoxes and Radio Buttons
Checkboxes and radio buttons are great when you want users to choose from a list of preset options.
-
When building a form, use checkbox if you want the user to select any number of options from a list. Use radio if you want to limit the user to just one selection.
-
Use .checkbox-inline or .radio-inline class to a series of checkboxes or radios for controls appear on the same line.
The following example demonstrates both (default and inline) types −
<label for = "name">Example of Default Checkbox and radio button </label>

<div class = "checkbox">
   <label>
      <input type = "checkbox" value = "">Option 1
   </label>
</div>

<div class = "checkbox">
   <label>
      <input type = "checkbox" value = "">Option 2
   </label>
</div>

<div class = "radio">
   <label>
      <input type = "radio" name = "optionsRadios" id = "optionsRadios1" value = "option1" checked> Option 1
   </label>
</div>

<div class = "radio">
   <label>
      <input type = "radio" name = "optionsRadios" id = "optionsRadios2" value = "option2">
      Option 2 - selecting it will deselect option 1
   </label>
</div>

<label for = "name">Example of Inline Checkbox and radio button </label>

<div>
   <label class = "checkbox-inline">
      <input type = "checkbox" id = "inlineCheckbox1" value = "option1"> Option 1
   </label>

   <label class = "checkbox-inline">
      <input type = "checkbox" id = "inlineCheckbox2" value = "option2"> Option 2
   </label>

   <label class = "checkbox-inline">
      <input type = "checkbox" id = "inlineCheckbox3" value = "option3"> Option 3
   </label>

   <label class = "checkbox-inline">
      <input type = "radio" name = "optionsRadiosinline" id = "optionsRadios3" value = "option1" checked> Option 1
   </label>

   <label class = "checkbox-inline">
      <input type = "radio" name = "optionsRadiosinline" id = "optionsRadios4" value = "option2"> Option 2
   </label>
</div>
Selects
A select is used when you want to allow the user to pick from multiple options, but by default it only allows one.
-
Use <select> for list options with which the user is familiar, such as states or numbers.
-
Use multiple = «multiple» to allow the users to select more than one option.
The following example demonstrates both (select and multiple) types −
<form role = "form">

   <div class = "form-group">
      <label for = "name">Select list</label>

      <select class = "form-control">
         <option>1</option>
         <option>2</option>
         <option>3</option>
         <option>4</option>
         <option>5</option>
      </select>

      <label for = "name">Mutiple Select list</label>

      <select multiple class = "form-control">
         <option>1</option>
         <option>2</option>
         <option>3</option>
         <option>4</option>
         <option>5</option>
      </select>

   </div>

</form>
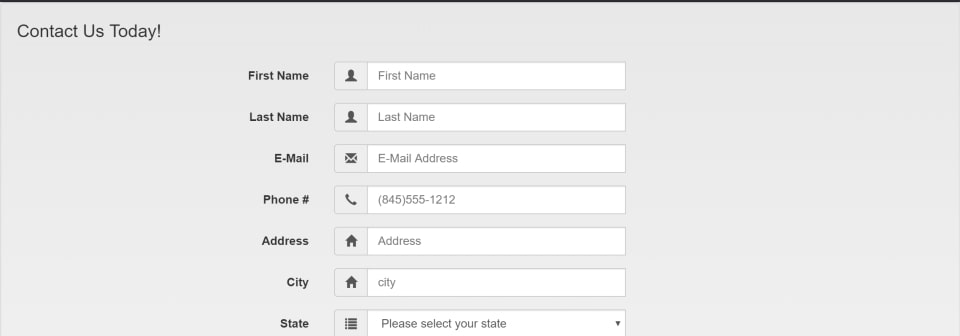
Multiple Inputs and Helpers
Add multiple inputs or addons:
Person
One
Two
Three
Example
<!— Multiple inputs —><form> <div class=»input-group mb-3″>
<div class=»input-group-prepend»> <span
class=»input-group-text»>Person</span> </div>
<input type=»text» class=»form-control» placeholder=»First Name»>
<input type=»text» class=»form-control» placeholder=»Last Name»>
</div></form><!— Multiple addons / help text —><form> <div class=»input-group mb-3″>
<div class=»input-group-prepend»> <span
class=»input-group-text»>One</span> <span
class=»input-group-text»>Two</span> <span
class=»input-group-text»>Three</span> </div>
<input type=»text» class=»form-control»> </div></form>
Sass
When using Bootstrap’s source Sass files, you have the option of using Sass variables and mixins to create custom, semantic, and responsive page layouts. Our predefined grid classes use these same variables and mixins to provide a whole suite of ready-to-use classes for fast responsive layouts.
Variables
Variables and maps determine the number of columns, the gutter width, and the media query point at which to begin floating columns. We use these to generate the predefined grid classes documented above, as well as for the custom mixins listed below.
Example usage
You can modify the variables to your own custom values, or just use the mixins with their default values. Here’s an example of using the default settings to create a two-column layout with a gap between.
Main content
Secondary content
Bootstrap Radio Buttons
Radio buttons are used if you want to limit the user to just one selection
from a list of preset options.
The following example contains three radio buttons. The last option is disabled:
Example
<div class=»form-check»> <label class=»form-check-label»>
<input type=»radio» class=»form-check-input»
name=»optradio»>Option 1
</label></div><div class=»form-check»> <label
class=»form-check-label»> <input type=»radio»
class=»form-check-input» name=»optradio»>Option 2 </label></div>
<div class=»form-check disabled»> <label class=»form-check-label»>
<input type=»radio» class=»form-check-input» name=»optradio» disabled>Option 3
</label></div>
As with checkboxes, use the class if you want the
radio buttons to appear on the
same line:
Example
<div class=»form-check-inline»> <label class=»form-check-label»>
<input type=»radio» class=»form-check-input» name=»optradio»>Option 1
</label></div><div class=»form-check-inline»> <label
class=»form-check-label»> <input type=»radio»
class=»form-check-input» name=»optradio»>Option 2 </label></div>
<div class=»form-check-inline disabled»> <label class=»form-check-label»>
<input type=»radio» class=»form-check-input» name=»optradio» disabled>Option 3
</label></div>
Anatomy
Table head
Similar to tables and dark tables, use the modifier classes or to make s appear light or dark gray.
| # | First | Last | Handle |
|---|---|---|---|
| 1 | Mark | Otto | @mdo |
| 2 | Jacob | Thornton | @fat |
| 3 | Larry | the Bird |
| # | First | Last | Handle |
|---|---|---|---|
| 1 | Mark | Otto | @mdo |
| 2 | Jacob | Thornton | @fat |
| 3 | Larry | the Bird |
Captions
A functions like a heading for a table. It helps users with screen readers to find a table and understand what it’s about and decide if they want to read it.
| # | First | Last | Handle |
|---|---|---|---|
| 1 | Mark | Otto | @mdo |
| 2 | Jacob | Thornton | @fat |
| 3 | Larry the Bird |
You can also put the on the top of the table with .
| # | First | Last | Handle |
|---|---|---|---|
| 1 | Mark | Otto | @mdo |
| 2 | Jacob | Thornton | @fat |
| 3 | Larry | the Bird |
Static Control
Use the class .form-control-static on a <p>, when you need to place plain text next to a form label within a horizontal form.
<form class = "form-horizontal" role = "form">
   <div class = "form-group">
      <label class = "col-sm-2 control-label">Email</label>

      <div class = "col-sm-10">
         <p class = "form-control-static">email@example.com</p>
      </div>

   </div>

   <div class = "form-group">
      <label for = "inputPassword" class = "col-sm-2 control-label">Password</label>

      <div class = "col-sm-10">
         <input type = "password" class = "form-control" id = "inputPassword" placeholder = "Password">
      </div>

   </div>
</form>
Other Tips and Edge Cases
By their very nature, forms are extremely diverse. It would be extremely difficult to provide a gem that could handle every need. Here are some tips for handling edge cases.
Empty But Visible Labels
Some third party plug-ins require an empty but visible label on an input control. The option generates a label that won’t appear on the screen, but it’s considered invisible and therefore doesn’t work with such a plug-in. An empty label (e.g. ) causes the underlying Rails helper to generate a label based on the field’s attribute’s name.
The solution is to use a zero-width character for the label, or some other «empty» HTML. For example:
label: "​".html_safe
or
label: "<span></span>".html_safe
Флажки и переключатели
Bootstrap 4 предоставляет классы .form-check, .form-check-label, .form-check-input и .form-check-inline для отображения флажков и переключателей.
Чтобы отобразить флажки или переключатели друг под другом, вложите каждый из них в элемент <div> с классом .form-check. Кроме того, добавьте .form-check-label к элементу <label> и .form-check-input к элементу <input>.
В одну строку
В Bootstrap 4 флажки и переключатели по умолчанию располагаются друг под другом. Вы можете отобразить их в одну строку, добавив .form-check-inline к внешнему <div>. Оставьте .form-check-input в элементе <input>.
<link rel=»stylesheet» href=»https://maxcdn.bootstrapcdn.com/bootstrap/4.0.0/css/bootstrap.min.css»>
<!— Флажки —>
<div class=»form-check form-check-inline»>
<input class=»form-check-input» type=»checkbox» id=»inlineCheckbox1″ value=»1″>
<label class=»form-check-label»>1</label>
</div>
<div class=»form-check form-check-inline»>
<input class=»form-check-input» type=»checkbox» id=»inlineCheckbox2″ value=»2″>
<label class=»form-check-label»>2</label>
</div>
<div class=»form-check form-check-inline»>
<input class=»form-check-input» type=»checkbox» id=»inlineCheckbox3″ value=»3″>
<label class=»form-check-label»>3</label>
</div>
<!— Переключатели —>
<div class=»form-check form-check-inline»>
<input class=»form-check-input» type=»radio» name=»inlineRadioOptions» id=»inlineRadio1″ value=»1″>
<label class=»form-check-label»>1</label>
</div>
<div class=»form-check form-check-inline»>
<input class=»form-check-input» type=»radio» name=»inlineRadioOptions» id=»inlineRadio2″ value=»2″>
<label class=»form-check-label»>2</label>
</div>
<div class=»form-check form-check-inline»>
<input class=»form-check-input» type=»radio» name=»inlineRadioOptions» id=»inlineRadio3″ value=»3″>
<label class=»form-check-label»>3</label>
</div>
</div>
Bootstrap 4 против Bootstrap 3
Bootstrap 3 для отображения флажков и переключателей использует .radio, .radio-inline, .checkbox или .checkbox-inline. Bootstrap 4 использует .form-check, .form-check-label, .form-check-input и .form-check-inline.
Disabled forms
Add the boolean attribute on an input to prevent user interactions and make it appear lighter.
Add the attribute to a to disable all the controls within. Browsers treat all native form controls (, , and elements) inside a as disabled, preventing both keyboard and mouse interactions on them.
However, if your form also includes custom button-like elements such as , these will only be given a style of , meaning they are still focusable and operable using the keyboard. In this case, you must manually modify these controls by adding to prevent them from receiving focus and to signal their state to assistive technologies.
Глобально важно
Bootstrap использует несколько важных глобальных стилей и настроек, о которых Вам нужно знать при его использовании. Все они почти исключительно направлены на нормализацию кроссбраузерных стилей. Давайте погрузимся.
Тип текущего документа
Bootstrap требует использования doctype HTML5. Без него Вы увидите несколько забавных неполных стилей, но его включение не должно вызывать каких-либо серьезных сбоев.
Адаптивный метатег
Bootstrap разработан mobile first (сначала мобильный), стратегия, в которой мы сначала оптимизируем код для мобильных устройств, а затем масштабируем компоненты по мере необходимости с помощью медиа-запросов CSS. Чтобы обеспечить правильный рендеринг и сенсорное масштабирование для всех устройств, добавьте метатег адаптивного окна просмотра (viewport) к Вашему .
Вы можете увидеть пример этого в действии в .
Свойство Box-sizing
Для более простого изменения размеров в CSS мы переключаем глобальное значение с на . Это гарантирует, что не влияет на окончательную вычисленную ширину элемента, но может вызвать проблемы с некоторым сторонним программным обеспечением, таким как Google Maps и Google Custom Search Engine.
В редких случаях Вам нужно переопределить его, используйте что-то вроде следующего:
В приведенном выше фрагменте все вложенные элементы, включая сгенерированный контент с помощью и будут наследовать указанный для этого .
Узнайте больше о коробочной модели и размерах на сайте CSS Tricks.
Перезагрузка
Для улучшения кроссбраузерности рендеринга мы используем Reboot, чтобы исправить несоответствия между браузерами и устройствами, обеспечивая при этом несколько более самоуверенный сброс общих элементов HTML.
Forms
Every group of form fields should reside in a element. Bootstrap provides no default styling for the element, but there are some powerful browser features that are provided by default.
- New to browser forms? Consider reviewing the MDN form docs for an overview and complete list of available attributes.
- s within a default to , so strive to be specific and always include a .
- You can disable every form element within a form with the attribute on the .
Since Bootstrap applies and to almost all our form controls, forms will by default stack vertically. Additional classes can be used to vary this layout on a per-form basis.
Доступность
Убедитесь, что у всех элементов управления формы есть подходящие доступные имена, чтобы их назначение можно было донести до пользователей вспомогательных технологий. Самый простой способ добиться этого — использовать элемент или в случае кнопок — включить достаточно описательный текст как часть содержимого .
В ситуациях, когда невозможно включить видимую метку или соответствующее текстовое содержимое, есть альтернативные способы предоставления доступного имени, например:
- Элементы скрыты с помощью класса
- Указание на существующий элемент, который может действовать как метка, используя
- Предоставление атрибута
- Явная установка доступного имени для элемента с помощью
Если ни один из них не присутствует, вспомогательные технологии могут прибегнуть к использованию атрибута в качестве запасного варианта для доступного имени в элементах и . Примеры в этом разделе представляют несколько предлагаемых подходов для конкретных случаев.
Несмотря на то, что использование визуально скрытого содержимого (содержимое , и даже , которое исчезает после того, как в поле формы появляется содержимое) принесет пользу пользователям вспомогательных технологий, отсутствие видимого текста метки все же может быть проблематично для некоторых пользователей. Как правило, лучше всего подходят видимые метки в той или иной форме как с точки зрения доступности, так и удобства использования.
Disabled forms
Add the boolean attribute on an input to prevent user interactions and make it appear lighter.
Add the attribute to a to disable all the controls within. Browsers treat all native form controls (, , and elements) inside a as disabled, preventing both keyboard and mouse interactions on them.
However, if your form also includes custom button-like elements such as , these will only be given a style of , meaning they are still focusable and operable using the keyboard. In this case, you must manually modify these controls by adding to prevent them from receiving focus and to signal their state to assistive technologies.
Auto-layout columns
Utilize breakpoint-specific column classes for easy column sizing without an explicit numbered class like .
Equal-width
For example, here are two grid layouts that apply to every device and viewport, from to . Add any number of unit-less classes for each breakpoint you need and every column will be the same width.
1 of 2
2 of 2
1 of 3
2 of 3
3 of 3
Setting one column width
Auto-layout for flexbox grid columns also means you can set the width of one column and have the sibling columns automatically resize around it. You may use predefined grid classes (as shown below), grid mixins, or inline widths. Note that the other columns will resize no matter the width of the center column.
1 of 3
2 of 3 (wider)
3 of 3
1 of 3
2 of 3 (wider)
3 of 3
Variable width content
Use classes to size columns based on the natural width of their content.
1 of 3
Variable width content
3 of 3
1 of 3
Variable width content
3 of 3
Responsive classes
Bootstrap’s grid includes six tiers of predefined classes for building complex responsive layouts. Customize the size of your columns on extra small, small, medium, large, or extra large devices however you see fit.
All breakpoints
For grids that are the same from the smallest of devices to the largest, use the and classes. Specify a numbered class when you need a particularly sized column; otherwise, feel free to stick to .
col
col
col
col
col-8
col-4
Stacked to horizontal
Using a single set of classes, you can create a basic grid system that starts out stacked and becomes horizontal at the small breakpoint ().
col-sm-8
col-sm-4
Mix and match
Don’t want your columns to simply stack in some grid tiers? Use a combination of different classes for each tier as needed. See the example below for a better idea of how it all works.
.col-md-8
.col-6 .col-md-4
.col-6 .col-md-4
.col-6 .col-md-4
.col-6 .col-md-4
.col-6
.col-6
Row columns
Use the responsive classes to quickly set the number of columns that best render your content and layout. Whereas normal classes apply to the individual columns (e.g., ), the row columns classes are set on the parent as a default for contained columns. With you can give the columns their natural width.
Use these row columns classes to quickly create basic grid layouts or to control your card layouts and override when needed at the column level.
Column
Column
Column
Column
Column
Column
Column
Column
Column
Column
Column
Column
Column
Column
Column
Column
Column
Column
Column
Column
Column
Column
Column
Column
Column
Column
Column
Column
Column
Column
Column
Column
Column
Column
Column
Column
You can also use the accompanying Sass mixin, :
Community
Stay up to date on the development of Bootstrap and reach out to the community with these helpful resources.
- Read and subscribe to The Official Bootstrap Blog.
- Join the official Slack room.
- Chat with fellow Bootstrappers in IRC. On the server, in the channel.
- Implementation help may be found at Stack Overflow (tagged ).
- Developers should use the keyword on packages that modify or add to the functionality of Bootstrap when distributing through npm or similar delivery mechanisms for maximum discoverability.
You can also follow @getbootstrap on Twitter for the latest gossip and awesome music videos.
Form Validation
You can use different validation classes to provide valuable feedback to
users. Add either or to the element,
depending on whether you want to provide validation feedback before or after
submitting the form. The input fields will have a green (valid) or red (invalid)
border to indicate what’s missing in the form. You can also add a
or message to tell the user explicitly what’s
missing, or needs to be done before submitting the form.
Example
In this example, we use to indicate what’s missing before submitting the form:
<form action=»/action_page.php» class=»was-validated»>
<div class=»form-group»> <label
for=»uname»>Username:</label> <input type=»text»
class=»form-control» id=»uname» placeholder=»Enter username» name=»uname»
required> <div class=»valid-feedback»>Valid.</div>
<div class=»invalid-feedback»>Please fill out this field.</div>
</div> <div class=»form-group»> <label
for=»pwd»>Password:</label> <input type=»password»
class=»form-control» id=»pwd» placeholder=»Enter password» name=»pswd»
required> <div class=»valid-feedback»>Valid.</div>
<div class=»invalid-feedback»>Please fill out this field.</div>
</div> <div class=»form-group form-check»>
<label class=»form-check-label»> <input
class=»form-check-input» type=»checkbox» name=»remember» required> I agree on
blabla. <div
class=»valid-feedback»>Valid.</div> <div
class=»invalid-feedback»>Check this checkbox to continue.</div>
</label> </div> <button type=»submit» class=»btn
btn-primary»>Submit</button></form>
Example
In this example, we use , which will add the validation effect AFTER the form has been submitting (if there’s anything missing).
Note that you will also have to add some jQuery code for this example to work
properly:
<form action=»/action_page.php» class=»needs-validation»
novalidate>
<div class=»form-group»> <label
for=»uname»>Username:</label> <input type=»text»
class=»form-control» id=»uname» placeholder=»Enter username» name=»uname»
required> <div class=»valid-feedback»>Valid.</div>
<div class=»invalid-feedback»>Please fill out this field.</div>
</div> <div class=»form-group»> <label
for=»pwd»>Password:</label> <input type=»password»
class=»form-control» id=»pwd» placeholder=»Enter password» name=»pswd»
required> <div class=»valid-feedback»>Valid.</div>
<div class=»invalid-feedback»>Please fill out this field.</div>
</div> <div class=»form-group form-check»>
<label class=»form-check-label»> <input
class=»form-check-input» type=»checkbox» name=»remember» required> I agree on
blabla. <div
class=»valid-feedback»>Valid.</div> <div
class=»invalid-feedback»>Check this checkbox to continue.</div>
</label> </div> <button type=»submit» class=»btn
btn-primary»>Submit</button></form><script>//
Disable form submissions if there are invalid fields(function() { ‘use strict’;
window.addEventListener(‘load’, function() { // Get the
forms we want to add validation styles to var forms =
document.getElementsByClassName(‘needs-validation’); //
Loop over them and prevent submission var validation =
Array.prototype.filter.call(forms, function(form) {
form.addEventListener(‘submit’, function(event) {
if (form.checkValidity() === false) {
event.preventDefault();
event.stopPropagation(); }
form.classList.add(‘was-validated’); },
false); }); }, false);})();</script>
❮ Previous
Next ❯
Custom Select Menu Size
Use the class to create a small select menu and the class for a large one:
Small Custom Select MenuVolvoFiatAudiDefault Custom Select MenuVolvoFiatAudiLarge Custom Select MenuVolvoFiatAudi
Example
<form> <!— Small —> <select name=»cars» class=»custom-select-sm»>
<option selected>Small Custom Select Menu</option> <option
value=»volvo»>Volvo</option> <option value=»fiat»>Fiat</option>
<option value=»audi»>Audi</option> </select> <!— Large —> <select name=»cars» class=»custom-select-lg»>
<option selected>Large Custom Select Menu</option> <option
value=»volvo»>Volvo</option> <option value=»fiat»>Fiat</option>
<option value=»audi»>Audi</option> </select></form>
Community
Stay up to date on the development of Bootstrap and reach out to the community with these helpful resources.
- Read and subscribe to The Official Bootstrap Blog.
- Join the official Slack room.
- Chat with fellow Bootstrappers in IRC. On the server, in the channel.
- Implementation help may be found at Stack Overflow (tagged ).
- Developers should use the keyword on packages that modify or add to the functionality of Bootstrap when distributing through npm or similar delivery mechanisms for maximum discoverability.
You can also follow @getbootstrap on Twitter for the latest gossip and awesome music videos.